Earlier this summer I learned about AWS Lightsail. I was looking for an easy way to spin up multiple WordPress websites for a plugin I’m working on and Lightsail was exactly the kind of tool I wanted.
I got the WordPress sites up and running, but I ran into an issue. How do I connect to the Lightsail database from the GUI I use on my Mac?
In this post, I’ll show you how to connect to the database from TablePlus and MySQL Workbench. This will also work for any database GUI that supports SSH connections.
Connect over SSH
The database you’re trying to connect to is running as a local process on your Lightsail instance. There’s no external database IP you can directly connect to from your local machine.
Instead, you’ll need to connect to the database over SSH. So your GUI will SSH into the Lightsail instance and then connect to the local database process. TablePlus, MySQL Workbench, and many others support database connections over SSH. All you need to do is gather a few extra connection details when configuring the GUI connection.
SSH connection info
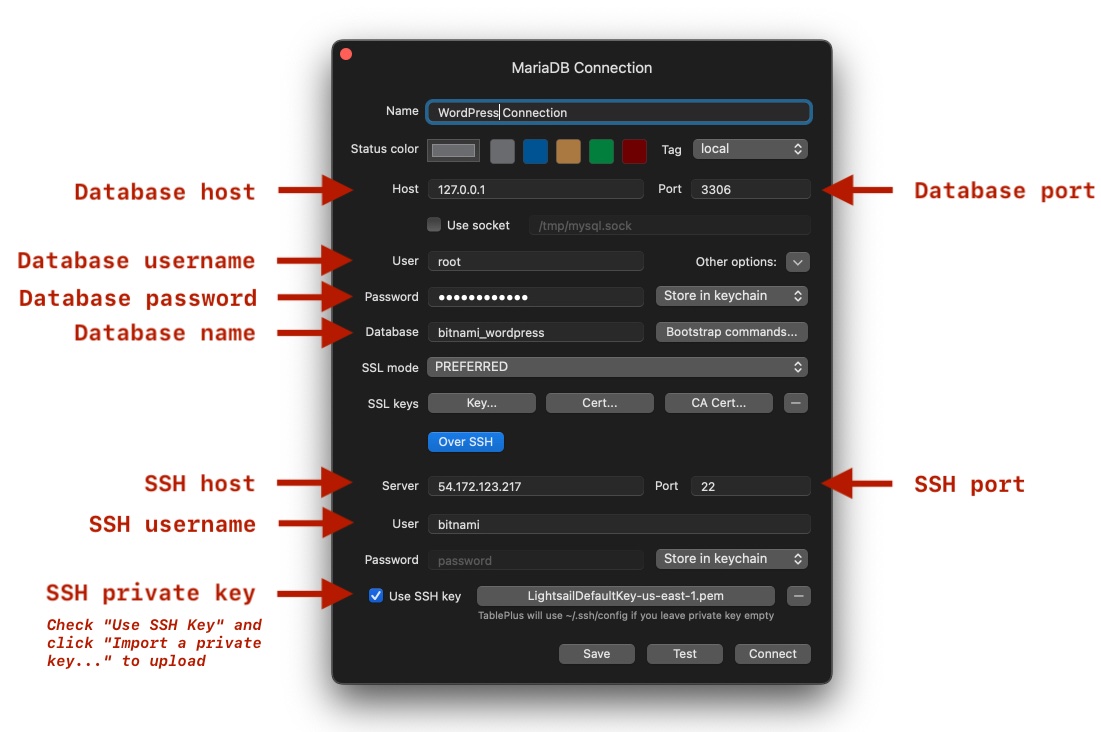
There are 4 pieces of info needed for the SSH connection. One is the port, and I’ll give that to you know. The SSH port you want to connect on is 22.
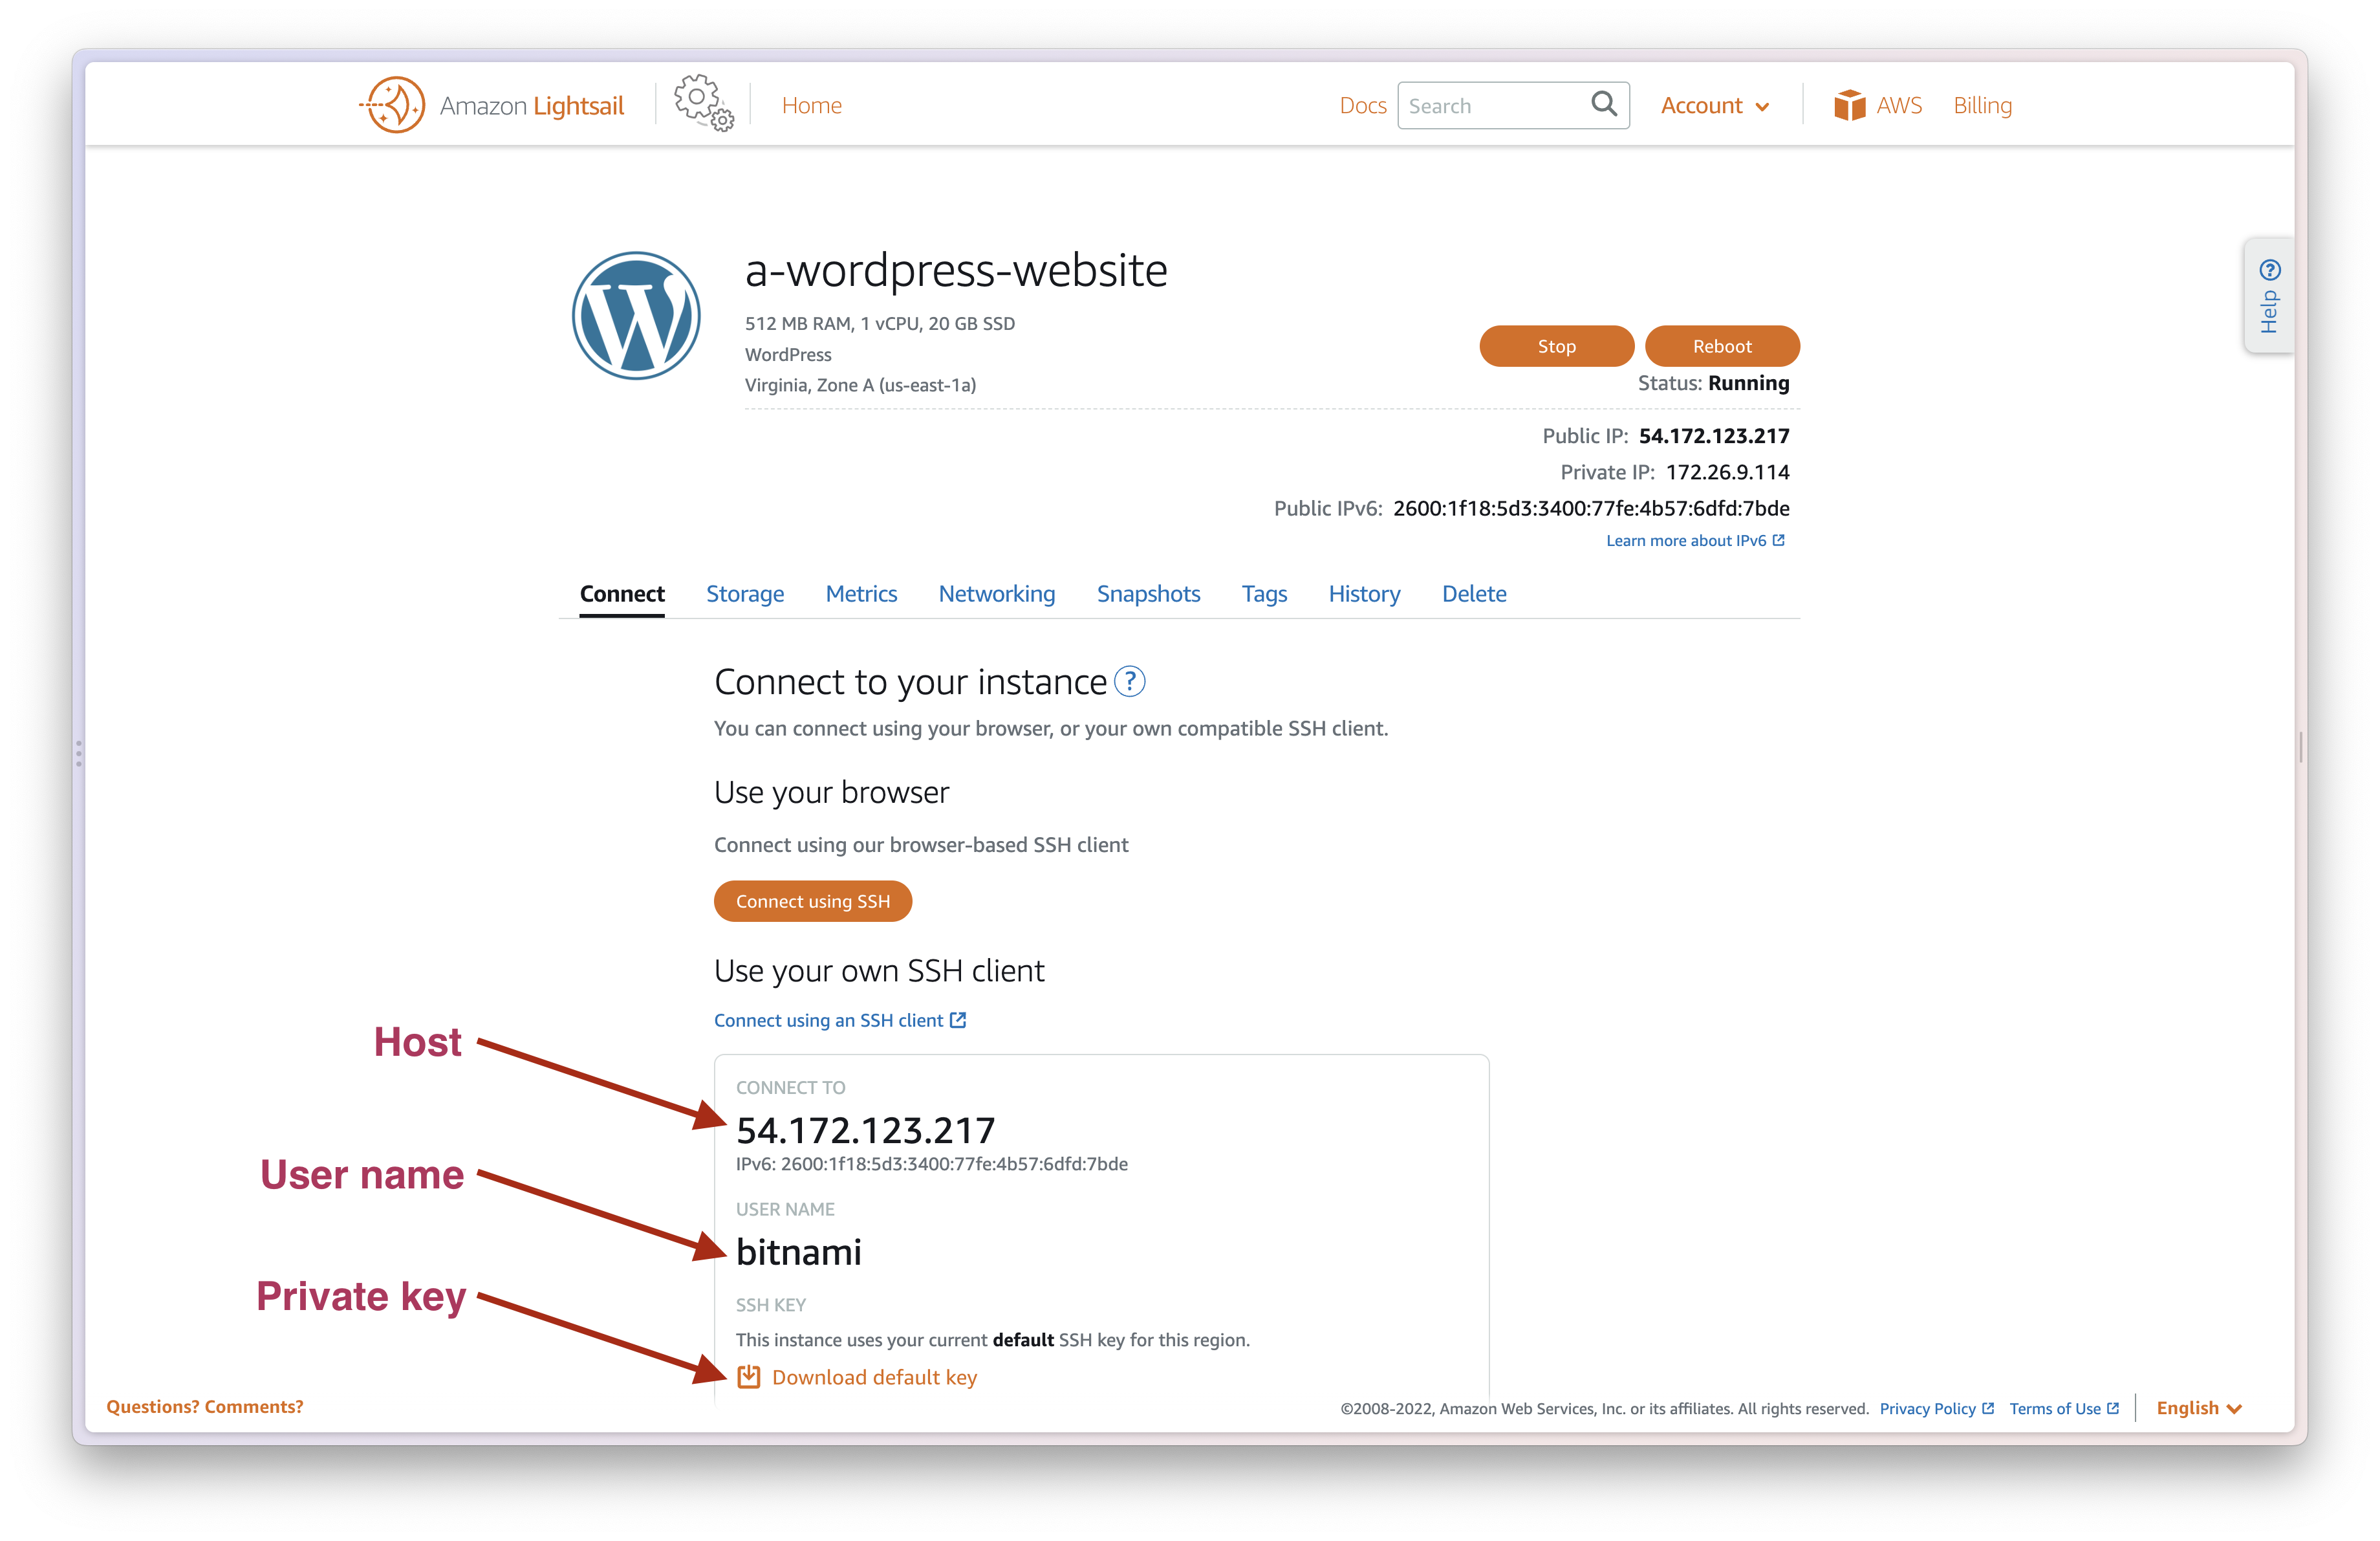
You’ll also need the host, username, and private key file. You can find all 3 of those on the “Connect” tab for your Lightsail instance in the AWS console. Checkout the screenshot below. Going off the screenshot, the host would be 54.172.123.217, the username would be bitnami and the private key file can be downloaded by clicking “Download default key”.
Database connection info
Next, you need to grab the database connection info. The host is 127.0.0.1. The database port is 3306. The database name is bitnami_wordpress. The username is root. The only piece of info you need to track down is the password.
The password is your bitnami application password. You might already know your password as it’s also your default WordPress login password.
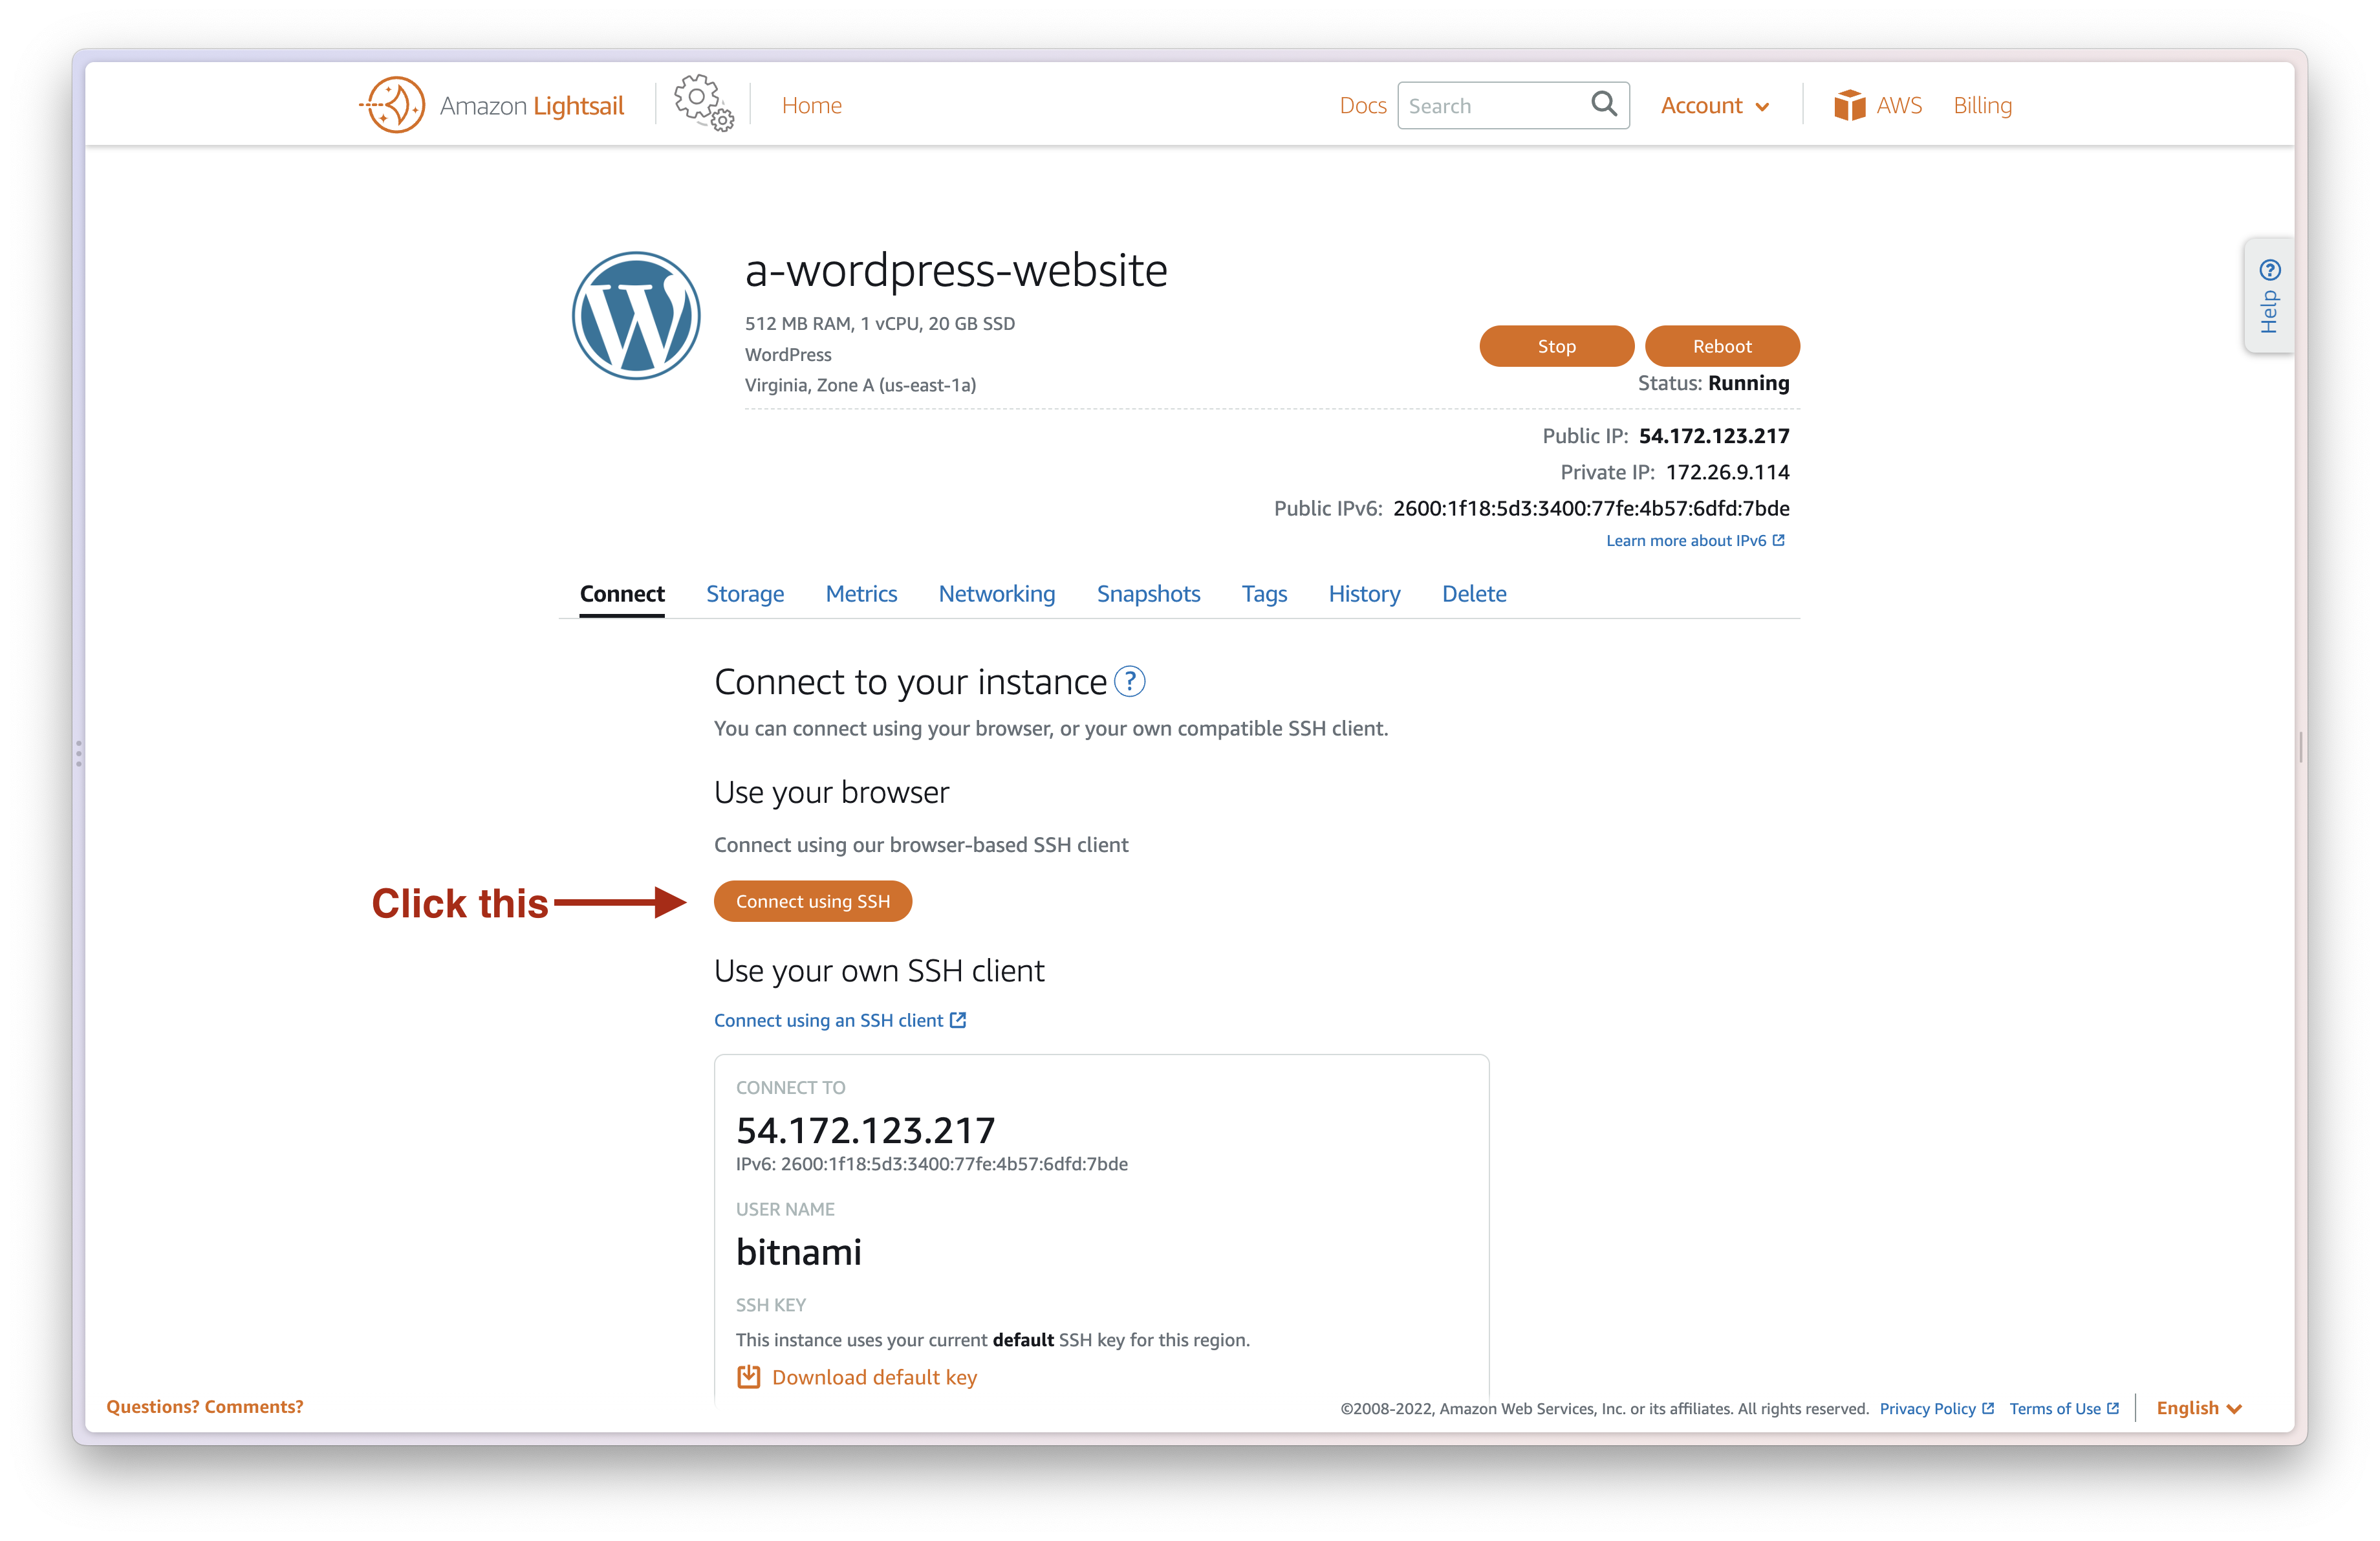
You can get the password by first SSHing into your instance.
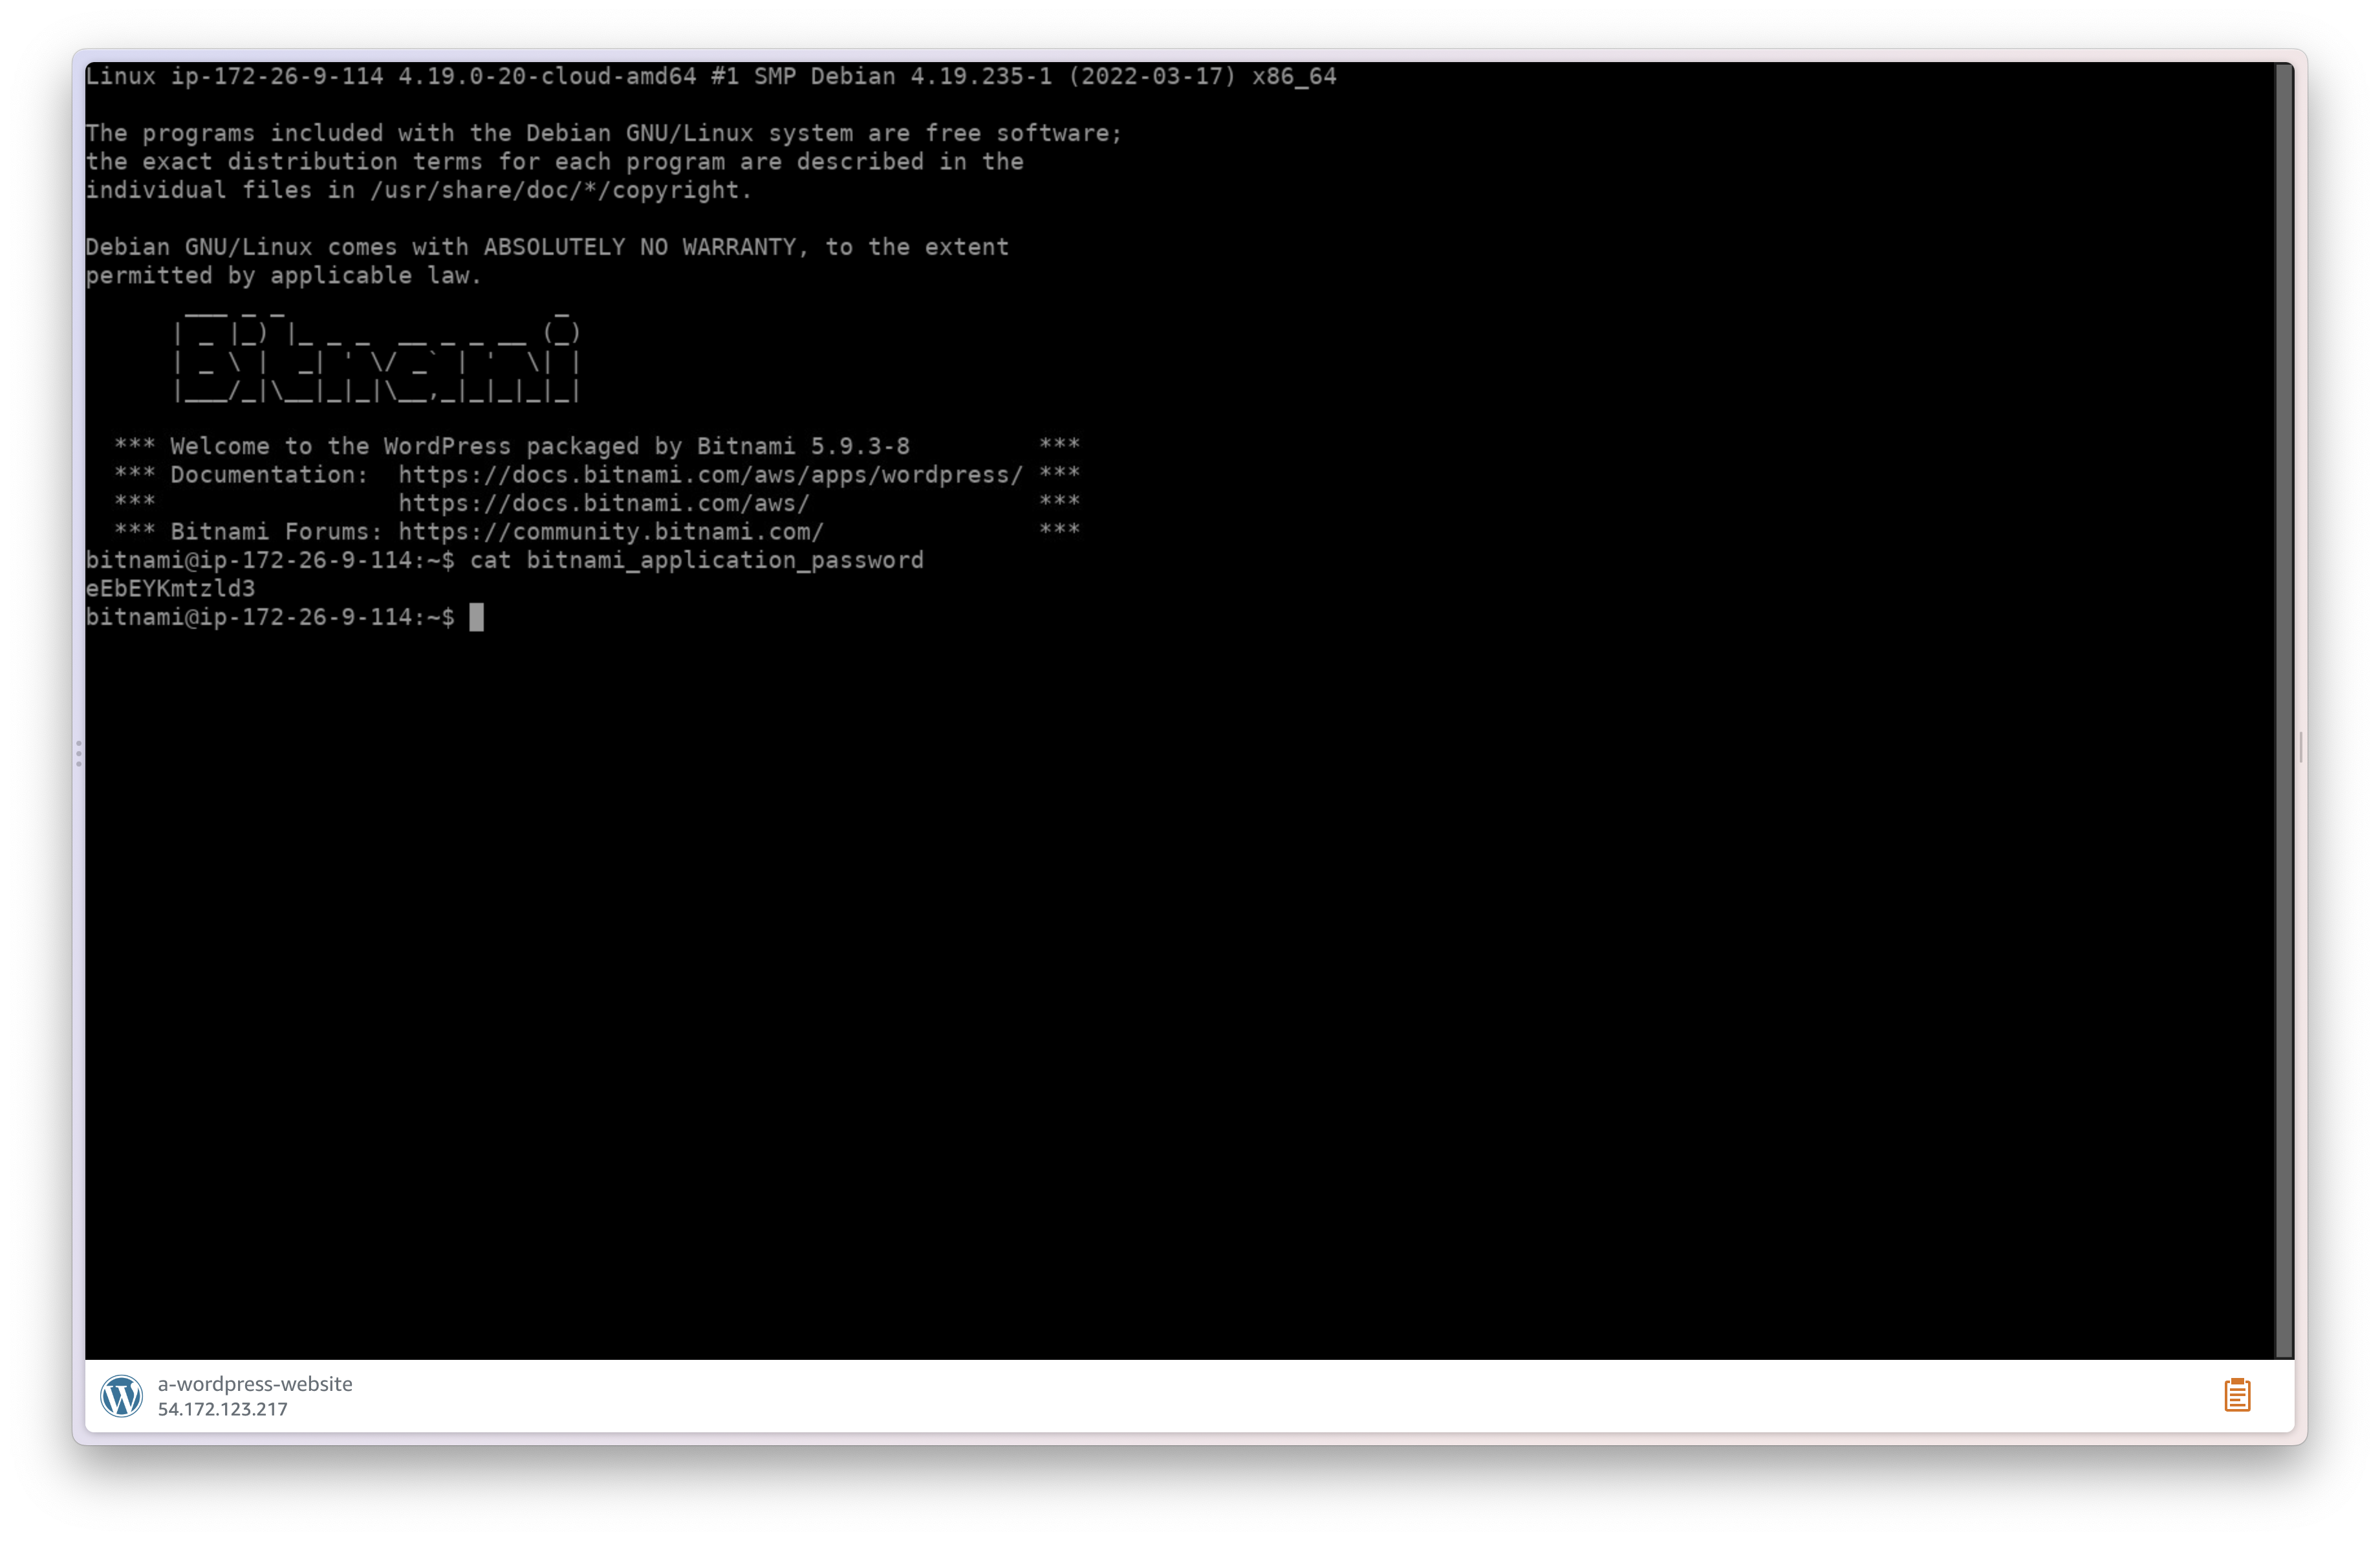
From there, run cat bitnami_application_password to get the password. You’ll need that when you setup the connection in the next steps.
Connect using TablePlus
You now have all the information you need to connect to the database. I’ll cover TablePlus first and then go through the same process with MySQL Workbench.
Create a new connection and you’ll see the following:
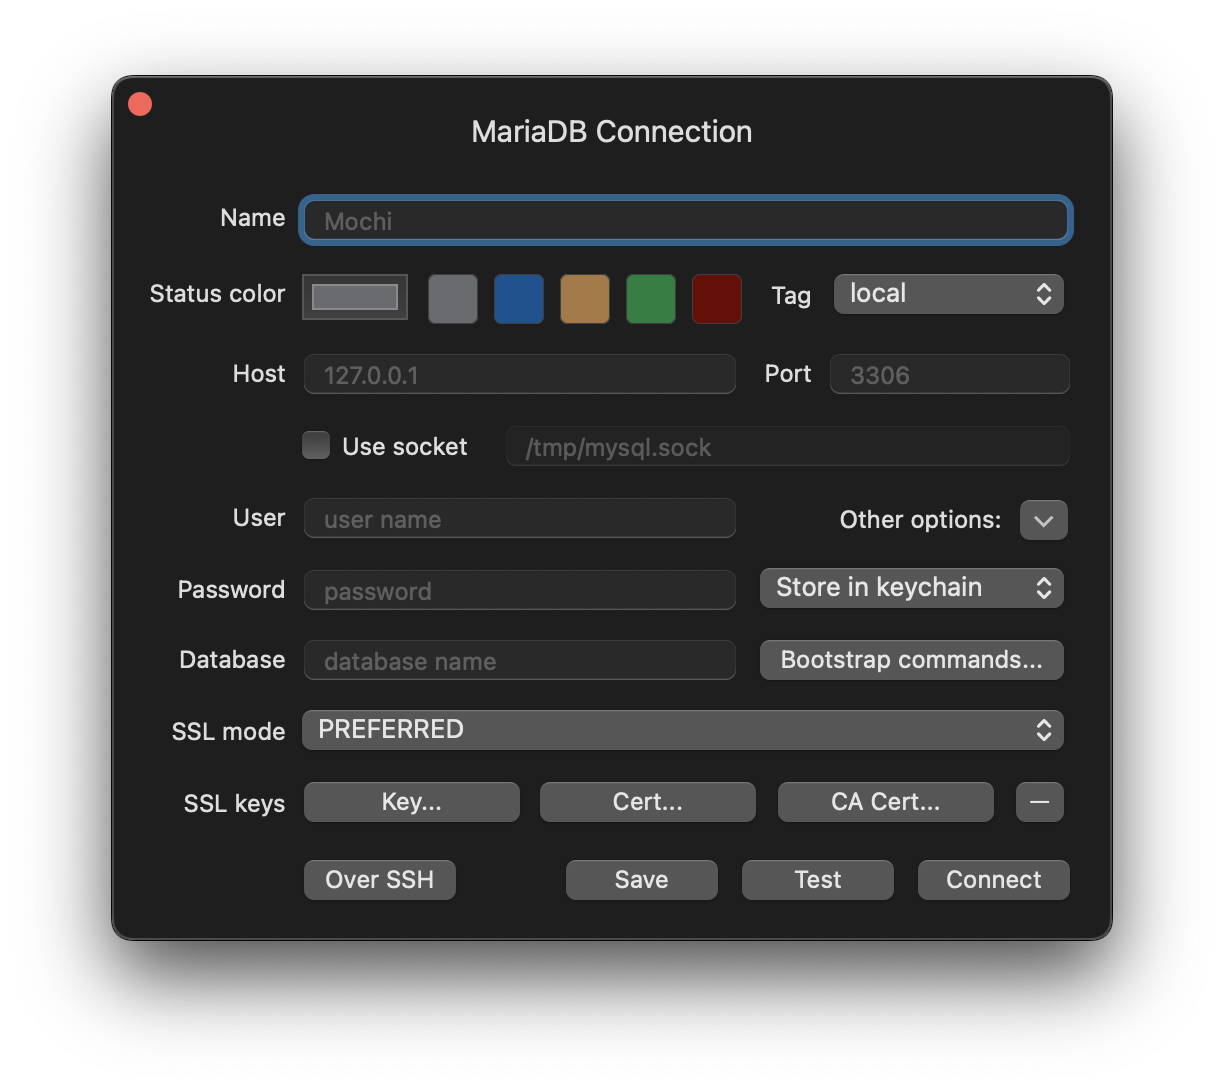
From there, click “Over SSH” at the bottom-left as we want to connect to our database over an SSH connection. Fill out the connection details and you’re done!
Connect using MySQL Workbench
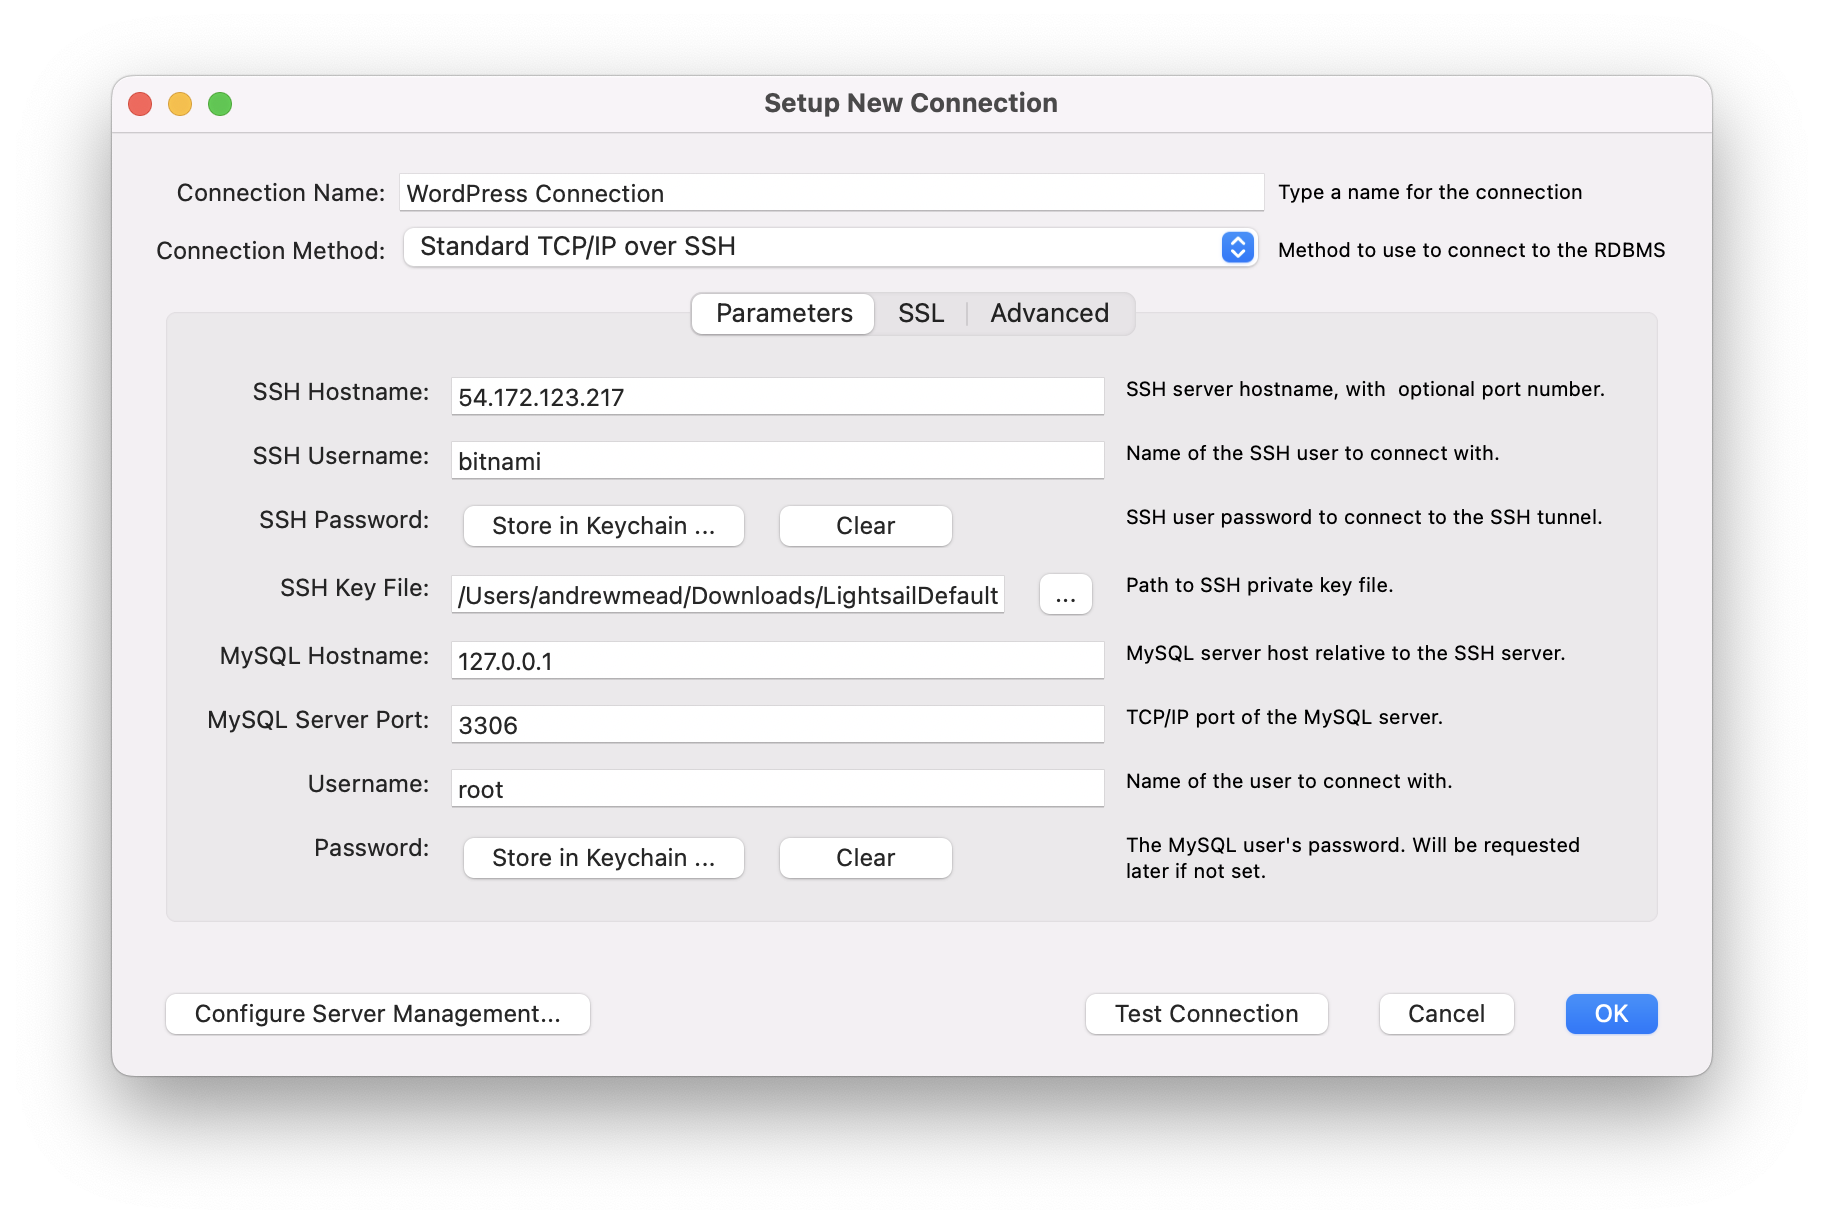
The process is similar for MySQL Workbench. When creating a new connection, make sure to change the “Connect Method” to “Standard TCP/IP over SSH” and then enter your SSH and database details.
